Menu

Do you see your car ceiling fabric sagging around the rear window, the dome light, or the sun visors? This is usually the first indication of something that is wrong with the headliner, and it's a problem that many vehicle owners overlook until the fabric begins to droop into their line of sight. In my personal experience, looking at the interiors of old vehicles, headliner problems are most prevalent on vehicles that are over 10 years old and are frequently driven in very hot climates. On hot days, temperatures can rise above 140°F (60°C), which can cause the foam layer underneath the fabric to deteriorate. The headliner sagging can impact the look of the cabin, the car's resale value, and driving comfort. The first step in repairing a sagging headliner is knowing why some repairs hold up, and some don't.
There are a host of issues with headliners that occur before the material even hangs down. In many vehicles, the materials beneath the headliner fabric can weaken over the years without any sign of damage. By the time the headliner begins to sag visibly, the deterioration process has usually been underway for months or even years.
A common theme, when checking car interiors for signs of wear, is that separation between trim and vehicle components typically starts around the roof openings, around the edges of the trim, and around the areas that experience the widest temperature fluctuations. This is why some areas of the headliner deteriorate faster than others within the same vehicle.
Age does not necessarily determine the risk of headliner sagging, but it is more likely to be a problem in cars 8-15 years old. The rate of deterioration is influenced by environmental conditions, material quality, exposure to moisture, and previous history of repairs. Understanding these factors is important because they help determine the extent of the damage and the condition of the underlying material.
When beginning any repair work, thoroughly check the headliner. A preliminary check can be done to uncover issues that may impact repair outcomes. Many vehicles will have an obvious sagging area, but the underlying material may be deteriorating across a much larger area.
Inspect the entire headliner in the light. Check for wrinkles, bubbles, or loose fabric, even if it's not the obvious sagging area. In older cars, headliner separation may start around visor mounts, dome lights, and grab handles and then work its way across the roof.
Look for any yellow, brown, or gray stains around the windshield, sunroof, roof antenna, or inside lights. A stain that is only 2-3 inches wide can be a sign that moisture has spread deeper into the fabric than it is visible.
Gently push down on the drooping area. If the fabric on the back feels loose, uneven, or powdery, the foam backing may be degraded. Fine yellow or orange dust on seats or trim is often a sign that the foam backing is breaking down. In many instances, the broken area below the fabric is bigger than the sagging area itself.
Check for cracks, bends, soft spots, or warps on the backing board. Be sure to look around the sunroof, visors, and interior lights, which are typically a source of vibration and stress over the years that can loosen the structure.
A comprehensive examination can identify potential problems before repair even starts, minimizing the likelihood of misdiagnosis and giving a better chance of a durable outcome.
If the right tools and materials are used in the repairs, the durability of repairs can increase, and the likelihood of failure can decrease. During hot weather, the temperature inside a vehicle can exceed 140°F (60°C), which is why automotive-grade products are necessary.
Use a high-temperature automotive headliner adhesive. Regular household glues are not suitable for high temperatures within a cabin and may weaken with time.
An upholstery roller is used for applying even pressure on upholstery, minimizing wrinkles and air pockets.
The majority of headliners have trim panels attached around them, which are fastened with clips or screws. Plastic trimming tools keep interior parts free of scratches and damage.
The interior backing to the automotive headliner fabric will typically be a thin layer of foam. It offers a more durable and smoother feel than regular fabric.
Use safety glasses, gloves, and a dust mask to safeguard against foam particles and adhesive fumes.
Tool or Material | Purpose |
Headliner adhesive | Creates a heat-resistant bond |
Upholstery roller | Smooths the material evenly |
Trim removal tools | Protects interior trim |
Screwdrivers | Removes fasteners |
Headliner fabric | Replaces damaged material |
Safety gear | Improves protection |
Using automotive-grade materials from the start can help create a longer-lasting repair.
The purpose of a temporary headliner repair is to improve appearance, and to help keep the loose fabric out of the line of sight, but not to solve the problem. The selection of the most appropriate method is dependent on the size of the sagging area and the condition of the material below the sagging area.
One of the most frequently used temporary solutions is the use of twist pins. They fit best on small sagging spots and are typically set at 3-6" spacing to provide a greater level of support. If applied uniformly, they may be effective in stabilizing the fabric for several months or years.
Upholstery tacks are more beneficial for larger areas of loose upholstery. Though they're not as prominent as a twist pin, they can be the right solution for headliners that have started to sag over a greater surface area.
Fabric tape works best around loose edges around visors, trim panels, or dome lights. It is not as effective in the middle of the roof, where gravity exerts more force. Temperatures inside the cabin can reach over 140°F/60°C, potentially reducing the life of the tape.
Repair kits will usually contain special fasteners for use on automotive interiors. They frequently make for a more aesthetically pleasing look than single pins, and can be helpful when aesthetics are important.
Many repair kits combine pins, fasteners, or specialized anchors designed for automotive interiors. They are often a quicker option for drivers who want a cleaner appearance than individual pins.
Method | Cost | Durability | Appearance |
Twist Pins | Low | Moderate | Good |
Upholstery Tacks | Low | Moderate | Fair |
Fabric Tape | Low | Low | Good |
Repair Kits | Moderate | Moderate | Better |
An important fact that many drivers miss is that temporary fasteners keep the fabric in place, but do not prevent the deterioration of the fabric under the surface. If the fabric sags again shortly after being pressed back into place, the damage is likely to be far more extensive than it seems.
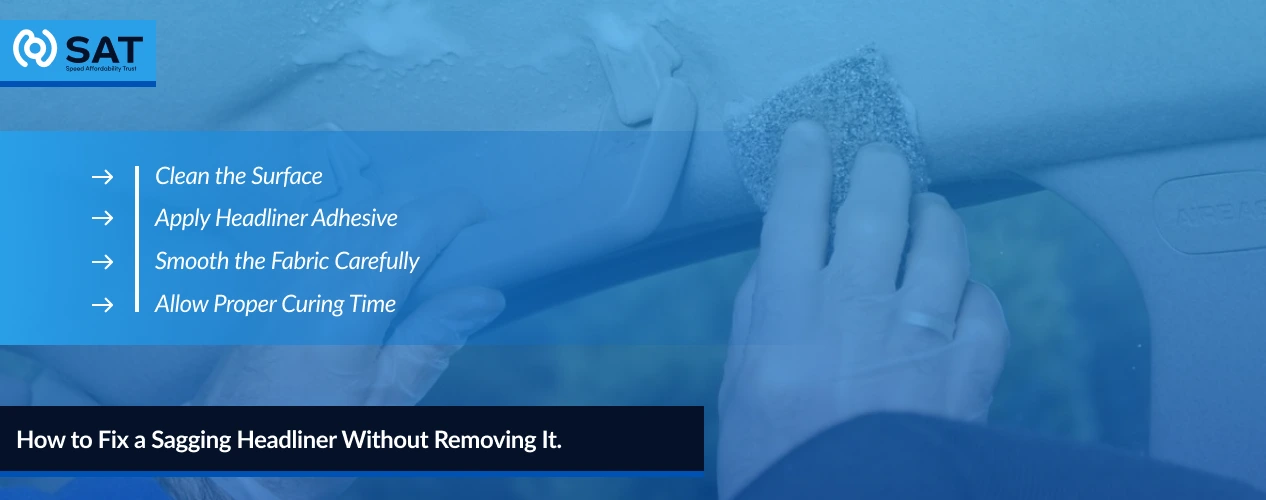
When the headliner fabric has just begun to separate, and only a small area of the roof is damaged, a no-removal repair is best. If the fabric drops back down as soon as it is pressed back into position, the issue is likely more serious than just the sagging. Many vehicles require a “no-removal” repair, and the success depends not only on the condition of the fabric but also on the condition of the underlying material.
Dust and remove debris from the affected area using a microfiber cloth or soft brush. A thin layer of contamination will interfere with the adhesive contact and bond strength.
Gently lift off the loose material and apply a thin and even layer of automotive headliner adhesive. Do not over-soak the material. If there is too much glue, the glue will bleed through the fabric and cause permanent marks.
Using firm pressure, move the fabric outwards from the center. This helps to minimize the amount of trapped air and provide more even tension throughout the repair area.
Many automotive adhesives will establish a strong initial bond in a couple of hours; however, disrupting the repair too early can compromise results. Keep doors and windows closed to minimize airflow and contamination while curing.
Applying excessive adhesive
Attempting to repair large sagging areas without removing the headliner
Using a small hole to spray adhesive rather than an open pocket area for the full spray
Handling or testing the repair prior to the curing process
A good test of the repair is to view the repair area from various perspectives. When viewed at an angle, small ripples or shadow variations may show a problem with bonding, which can be difficult to see if looked at head-on.
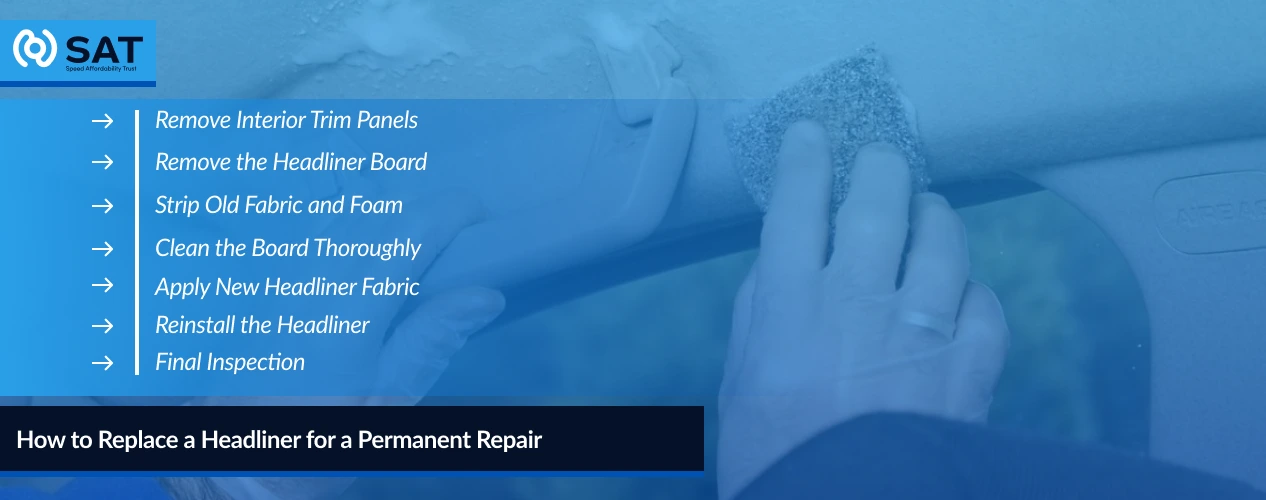
When the existing headliner material is too worn or damaged, the best option is to replace it completely. This process not only replaces the top layer of fabric, but also replaces the layer of support material below it, unlike a temporary fix. However, a well-installed replacement can last for 10 years or longer in many vehicles. The quality of the finished repair often depends more on preparation than on the new fabric itself.
Remove headliner elements such as sun visors, grab handles, dome lights, pillar trim, etc. Organize clips and fasteners so that there are no loose pieces that could cause movement or rattles after reassembling.
Carefully lower the backing board. In many passenger vehicles, the board can be over 4 feet long and is prone to cracking or warping when it is removed.
Scrape and eliminate old fabric and damaged foam. This is one of the most vital stages in the process. With even a small amount of leftover foam, there will be bonding areas that are not as strong as they should be, and visible imperfections under the new material.
Carefully check the board for any loose particles and remove them from the board. A smooth surface will ensure even contact over the whole headliner surface.
Carefully place the new fabric so that it is aligned. A minor displacement on one side can have a significant effect throughout the roof area.
Replace board and interior components, ensuring that cutouts and mounting areas are aligned.
Look at the final headliner in various lighting situations, from various seating positions. The headliner should look smooth, flat against the roof, and have no ripples, puckers, or shadow lines.
When installing for the first time, many people are concerned with the fabric, but forget that the backside of the fabric is the board it is attached to. Even if a fabric is installed properly, a warped board can pass imperfections through the fabric.
The best repair method depends on the condition of the headliner, type of vehicle, and level of experience. A self-repair job may save some cash in the short run, but it may not necessarily be the most cost-effective in the long run. The biggest challenge is handling a large roof panel, working around interior trim, and achieving a smooth finish. Knowing the pros and cons of the situation before you get started will ensure that you avoid making expensive errors.
DIY repair may be a good choice for older vehicles, minor sagging, and owners who are comfortable working with interior components. First-time repairs can take several hours, particularly if learning how materials react during the installation process.
For luxury vehicles like BMW, cars with panoramic sunroofs, or vehicles that have delicate interior trim, professional repair is likely the best option. The boards in the headliner of a large SUV, van, or crossover are usually heavier and harder to deal with than those in smaller cars.
A lot of headliners are over 4 feet wide and have to be centered in the correct position on a large area. Even small alignment mistakes can become highly noticeable once the repair is complete.
A successful DIY repair can make a huge difference in terms of cosmetic appearance, while a professional repair may offer a more uniform finish. But experienced technicians are also aware of the hidden problems that can occur in the long run.
Factor | DIY Repair | Professional Repair |
Upfront Cost | Lower | Higher |
Time Investment | Several Hours | Minimal Owner Time |
Skill Requirement | Moderate | Professional Expertise |
Risk of Board Damage | Higher | Lower |
Finish Consistency | Variable | High |
Best For | Older Daily Drivers | Luxury or Complex Vehicles |
Many neglect to mention one point, which is that a repair may seem flawless in the home, but may turn out to be a problem after a few days of fluctuating temperatures. Experts might test the outcome under various conditions and lighting to guarantee uniformity.
The price of repairing a sagging headliner will vary depending on the extent of the damage. Repair costs are often influenced more by vehicle design, labor requirements, and interior complexity than by the materials themselves. For instance, the headliner in a compact sedan can be the same material as that in a full-size SUV, but the larger car will probably take more labor to deal with and reinstall the headliner. Another factor that can make repair costs differ between regions is the cost of labor.
Generally, the cost of materials for a DIY headliner repair is $20 to $100. This will vary depending on the actual repair method, quality of the materials used, and the size of the damaged area.
An estimate for a small section of a sagging roof is typically between $75 and $250. This is usually a preferred choice because the surrounding material is not damaged.
The total cost for full replacement is typically $200-$800+. Larger vehicles like luxury cars, large SUVs, vans, and those with panoramic sunroofs tend to be on the high side due to the extra labor required and the size of the materials needed.
There are a number of factors that will affect the end price:
Roof height and width, vehicle dimensions
Sunroof openings or panoramic roof openings
Interior trim complexity
Material quality
Regional labor rates
Hidden damage discovered during repair
Repair Type | Typical Cost Range |
DIY Repair | $20–$100 |
Partial Professional Repair | $75–$250 |
Full Headliner Replacement | $200–$800+ |
Many owners don't realize that the lowest bid might not be the best deal. Repairs may incur extra expenses if faulty clips, cut-outs, or backing board problems are found in the repair process. With newer vehicles, a quality repair may also help maintain their interior condition and resale value.
The answer to the question of how long a headliner repair will last is going to vary depending on the situation. Depending on the type of repair and the condition of the car's interior, the repair can last for a few months or longer than a decade. In my experience, the biggest factor is not the repair itself, but how well it withstands years of temperature changes inside the vehicle.
Repair Method | Average Lifespan |
Pins, Tacks, and Repair Kits | Several Months–3 Years |
Adhesive-Based Repairs | 3–7+ Years |
Full Headliner Replacement | 10+ Years |
Two vehicles repaired on the same day can have very different long-term results. A vehicle parked in a garage for long periods of time will not be as harsh on the interior materials as will a vehicle left outside year-round. Over time, repeated heating and cooling cycles can gradually weaken repair materials even if the repair looks good.
Signs that a repair is holding up well include:
Smooth tension of the fabric over the entire surface area
No edge separation is visible
No new lines or wrinkles
A uniform appearance under different lighting conditions
Headliner repair is not something that commonly happens overnight. Watch for:
Small gaps forming near the edges
Slight fabric movement when touched
New shadows or slight changes in the texture
Small ripples that gradually become more noticeable
One detail many vehicle owners overlook is that a repair can appear perfect for months before showing subtle warning signs. These changes could help you determine if the repair will last in the long term before big sagging returns.
A lot of headliner repairs do not work out as they should weeks or months after being installed. Many costly repair failures are caused by small mistakes that seem unimportant at first. A repair may look flawless at first but reveal weaknesses after repeated temperature changes. Here are some of the most common places where repairs are likely to fail, and why:
A major error is only looking at the sagging portion that is plainly visible. Hidden damage can lead to uneven results and premature repair failure.
Loose material, residue, or thin dust layers can impact bonding consistency. In many failed repairs, it is the preparation that is at fault, not the preparation product.
The interior of vehicles is subjected to considerable heat and cold changes in a year. The repeated heating and cooling can cause poor performance in materials when used indoors.
The first place problems tend to occur is around edges, corners, visor openings, and light cut-outs where there is more movement and tension than in the larger flat areas.
Lots of repair defects may not be readily evident. Some weaknesses only become visible after several weeks of temperature changes.
A sagging headliner is often one of the first visible signs that a vehicle's interior materials are beginning to age. A loose area can slowly expand and impact the look and cabin condition. It is important to match the repair solution to the damage, not the fastest and cheapest!
In general, if the problem is small and contained, it might be better to do limited repairs, but if the problem is widespread, then a complete replacement may be more feasible in the long run. A quality replacement will last for 10 years or more, and is one of the longest-lasting interior repairs available.
The biggest takeaway is that headliner issues do not just ‘happen' overnight. Visible sagging is often the final sign of a deterioration process that has been developing for months or even years. Early diagnosis can help preserve interior appearance, value of the vehicle, and prevent further work being needed in the future. The best repair is not always the most expensive one—it is the one that delivers reliable, long-lasting performance.
If you are considering purchasing a used vehicle, paying close attention to interior details such as the headliner can provide useful clues about overall care and maintenance. Reputable exporters and dealers, including SAT Japan, often provide detailed vehicle photos and condition reports, making it easier for buyers to assess the interior before making a decision.
Toyota Smallest Cars: Redesign, Specs, and Range Guide

The Next Generation of Japanese Automobile

A Detailed Guide on Semi-Automatic Transmissions

Blake Hayes
I am Blake Hayes, a dedicated automotive journalist with 16 years exploring the fascinating realm of cars and transportation. My detailed analysis and passion for innovation drive my articles. I contribute to renowned publications and often present at key automotive events.
A headliner can sag due to age, heat exposure, humidity, or deterioration of the adhesive used during its installation.
Yes, you can fix a sagging headliner without removing it by using a high-quality headlining adhesive. This is more effective for small areas of sagging.
To prevent future sagging, avoid exposing your car to extreme heat and humidity. Regularly inspecting and maintaining your headliner can also help prolong its life.
_1733298329.webp)
The Hyundai Palisade has been one of the most favored family cars in the petrol-head community. The Palisade has been known to blend style, efficiency, agility, and performance, all in one car. Coming in 7 different trims, with 4 diverse driving modes, this vehicle holds the solutions to all your adventure troubles, with a comfortable cabin, ample cargo space, and an innovative infotainment system. Moving into 2025, the 2025 Hyundai Palisade is introduced with some fresh updates making the SUV even more favorable for drivers.
Written below are all the incoming updates and changes to the 2025 Hyundai Palisade.
The 2025 Hyundai Palisade has a 3.8 Liter V6 engine that is paired with an 8 speed automatic transmission which delivers an output of 291 horsepower. This vehicle’s powertrain also features a manual control option for the transmission to give the driver more control. All trims come with a front-wheel drive, with an optional all-wheel drive upgrade to kick things up a notch.
The 2025 Hyundai Palisade’s 0-60 miles per hour driving time was tested to be 6.4 seconds, which is impressive for an SUV its size. Additionally, the front wheel drive Palisade has a fuel-economy of 19 mpg in the city and 26 mpg on the highway.
This three-row SUV is one of the most stylish of its kind; with a bold cascading grille, flanked by powerful and elongated LED lights, and sharp lines throughout the exterior for aerodynamic manipulation. The Palisade has a muscular stance giving it a sporty and intimidating look. The Palisade also comes with convenient exterior features such as a power liftgate, additional roof rails, folding third-row seats, and a panoramic sunroof.
The 2025 Hyundai Palisade has an opulent interior with a spacious cabin lined with the finest materials. The interior has a 12.3-inch touchscreen display featuring a dynamic digital cluster, Android Auto, Apple CarPlay, a premium sound system, dual Bluetooth connectivity, and an innovative remote controlling feature by the Hyundai Blue Link app, which gives you lock control from a distance.
The new model of the 2025 Hyundai Palisade has a starting price of $38,215 and it goes all the way up to the highest trim costing $55,515. The base trim, the SE model costs $38, 215; the second SEL model costs $40,965. The XRT trim comes in at about $44,065 while the SEL Premium trim costs $45,565. The Limited trim of the 2025 Hyundai Palisade costs $49,615 and the Caligraphy model costs $52,015. Last but certainly not least, the Calligraphy Night Edition of the Hyundai Palisade costs $55,515.
The 2025 Hyundai Palisade will be featuring 4 diverse driving modes including comfort, Eco, Sport, and Smart driving modes for an optimized and engaging drive:
Comfort: The comfort mode is set to deliver a seamless and smooth driving experience. The suspension and transmission are tuned for daily commuting driving.
Eco: The Eco mode in the 2025 Hyundai Palisade prioritizes the engine’s fuel efficiency, This mode may not deliver the most powerful performance, but the powertrain is adjusted to consume the least amount of gasoline for the more long-lasting output. This keeps the fuel economy high and decreases fuel costs.
Sport: The Sport mode focuses primarily on the speed and performance of the 2025 Hyundai Palisade. The steering and powertrain are tuned to create the maximum output while maintaining the vehicle’s agility.
Smart: The Smart driving mode is an intuitional setting that analyzes your driving style and switches the driving mode accordingly, giving you maneuverability and balance. This driving mode essentially also helps in fuel efficiency.
In comparison to other latest models, the 2025 Hyundai Palisade is relatively more affordable to maintain. The annual repair and maintenance cost for this vehicle begins at $352 and rises every year because of depreciation and can reach up to $739 in the first five years after purchase. Additionally, with high fuel efficiency, annual fuel costs are calculated to be up to $2,380 per year. All-in-all, you can rest assured that the 2025 Hyundai Palisade has a low maintenance and upkeep cost. Here are some factors contributing to this:
Hyundai Durability: Hyundai, like most other Japanese automakers, has a business model of constant improvement and innovation. These vehicles are engineered to be optimized for long-term usage. This rhombus engineering keeps your 2025 Hyundai Palisade away from the mechanic for a long while.
Expected Maintainance: You can rest assured that even if you were to take your Palisade to the mechanic, it would be out of routine, rather than from an unexpected mechanical breakdown. Routine check-ups such as oil changes and tuning will help maintain the longevity of your vehicle.
Visit Now 2025 Hyundai Elantra.
SAT Japan is the ultimate destination for those searching for well-maintained and certified Used Cars for Sale. We offer impressive deals on a wide range of luxury and economy vehicles. Our expert staff on board is dedicated to your ease and our customer-centric services will make the entire process unbelievably simpler. Our convenient services such as our insurance services, 24-month installment payment plan, and doorstep delivery, keep our customers stress-free. We recognize our responsibility to present the best course of action according to your preferences.
Although there are no revolutionary switch-ups in the design or performance of the 2025 Hyundai Palisade, it is one of the most reliable upcoming full-size SUVs in the automotive market. It is no easy feat searching through the endless sea of options to reach a final decision. Our expert staff and customer-centric services at SAT Japan help you make the right decision at every step of the purchasing process. Hence, SAT Japan is the ultimate car enthusiast website where you can find a plethora of well-maintained options for your potential next ride. Head on over to SAT Japan’s website and scroll through our vast inventory to find the perfect Hyundai car for you.

The modern cars coming in the market are capable of remarkable speeds and give you a highly smooth and comfortable experience. The latest cars are also much safer and come up with advanced and autonomous systems that can stop and steer the vehicle for you in an emergency. However, all the safety and advanced features will not do anything if you have bad tires. For example, inside tire wear is an issue that can affect the tires of many cars rolling on the road. It is not just about purchasing low-quality tires; it is also about not ensuring their proper maintenance.
Tire wear is a common problem that can affect your vehicle’s handling, safety, and performance. Although inner tire wear might seem harmless, it can lead to various serious issues, including reduced traction, poor steering response, and even blowouts.
But why do tires wear out from the inside, and how can you prevent it?
By understanding the factors that contribute to inner tire wear, you can increase the life of your tires and keep them performing at their best.
There are several reasons why your tire can wear from the inside. Below we discuss some of the reasons in detail.
Misaligned wheels can lead to irregular tire wear. When the bottom part of the tire is leaning towards the outside, it is called a negative camber. Positive camber is when the top part of the tire is leaning towards the outside.
When there is improper alignment in the tires, the inner part of the tire makes more contact with the road surface. Because of that, you might observe the inside of the front tires wearing down.
Poor wheel alignment can also mess up your camber. You can verify this by cruising on a flat section of asphalt. If your vehicle is not moving straight even after pointing the wheels at a 12 o’clock position, it means your wheels are not aligned properly.
Driving your vehicle aggressively puts a lot of stress on your tires. It can also overheat various components of the tires and wear the thread at a faster pace because of abrasion. Aggressive riding includes running your vehicle at maximum acceleration, hard cornering, and pushing brakes for prolonged periods. Tire wire showing is an indication of your tires being severely damaged.
It is essential to note that, unlike race cars, standard vehicles are not designed to be driven aggressively all the time. The tires in race cars are specifically designed to give maximum gain and resolve steering on the road. However, other tires cannot keep up with constant beating from drifting and fast driving.
For more insights into premium tire options, check out our detailed comparison: Bridgestone vs. Michelin Tires.
The suspension components of a vehicle are designed to not only absorb road shocks and vibration but also to make sure that the vehicle’s shock ride height remains the same. It is important because camber angles are directly affected by it, and it can increase inside tire wear.
Suspension components such as springs can sag through regular use. Faulty or defective springs fail to absorb shocks and vibrations, which can damage other suspension components of the vehicle as well.
Also, the defective spring can lower the vehicle’s stock ride height, which can change the camber angles.
These components are made of rubber or elastomer and serve to link the chassis and steering knuckles. These bushings eliminate excess free movement within the vehicle, which can have a negative effect on camber angles. As a result of frequent use, the control arm bushing wears down gradually, leading to increased movement and more tire wear on the inside.
It is crucial to fix the inner tire wear to avoid further damage to the vehicle’s components, such as ball joints and springs, and ensure more safety.
Get your wheel balanced after every one or two years. If you have installed new tires in the vehicle, you should get them balanced immediately to protect them from wearing out.
If you notice uneven tire wear, check your suspension system. Damage to the suspension system can accelerate the inner tire wear, resulting in future problems such as a decrease in vehicle speed and expensive repairs.
Innerwear on tires occurs when the driver does not maintain their tires regularly. Just like your vehicle, your tires require extra care to give you a safe ride.
Regularly check the tire pressure of your vehicle. It is an important practice because understated tires can cause the sidewall to flex, which can lead to instability at higher speeds. Also, underinflation can cause other problems, including cracked rubber, tread separation, bulges, and more. If the tires are overinflated, they can bulge in the center, causing increased wear in that area.
Therefore, it is preferable to check the tire pressure once every month, especially after large temperature changes.
If you notice damage on any of the suspension components, it is important to get your vehicle inspected by a professional mechanic. Doing that will resolve the issue and your car will also stay safe.
Tire wearing on the inside can also occur as a result of overloading. It is important to adhere to the vehicle weight limits mentioned by the manufacturers. Overloading includes passing extra passengers, carrying excessive cargo, or towing large tailors, which can put stress on the components of the tire.
Tires wearing on the outside and inside can seriously affect the handling and safety of your vehicle. You can avoid internal tire damage with a routine inspection of your suspension system and alignment and by taking proper care of your tire. It is also important to get your vehicle inspected by a professional mechanic every once in a while.

There are a lot of parts that go into making your vehicle run fast and look its best. The engineers have spent years and years tuning car emission systems to personalize the sound a vehicle makes when it’s on the road. However, when it comes to riding, not everyone wants to have a quiet ride, and for that, you can modify your vehicle’s straight pipe exhaust system and alter the sound your engine produces.
A very exciting modification for car owners currently is the straight exhaust system, particularly for people who want to improve the performance of their ride. One reason car owners choose it is its greater functionality in compression compared to stock exhaust. The reduced backpressure supports greater functionality, resulting in increased engine performance.
If you are wondering if a straight-pipe exhaust system is right for you, keep reading to learn the pros and cons of installing one in your vehicle.
Straight pipe exhaust is becoming one of the most common modifications among car fans who enjoy the roar of their engine along with the additional power of their vehicles. Unlike standard exhaust systems, straight-pipe exhaust systems do not have a resonator, muffler, or catalytic converter. You can witness this type of exhaust in racing cars and other high-performance vehicles.
The exhaust system allows the fumes to flow freely from the engine’s exhaust headers, allowing them to go into the atmosphere directly through the exhaust tip. They increase the horsepower of your engine because there are no restrictions on the exhaust, and the gases to flow freely.
Explore our in-depth guide on the straight pipe exhaust system to enhance your car's performance and sound quality.

There are many reasons for considering a straight pipe exhaust for your vehicle, including:
Increased Performance
The prime reason why many people choose straight pipe exhaust is because these systems increase your vehicle’s horsepower and torque. These systems also reduce the back pressure from the engine, allowing the exhaust gases to move freely and assisting the engine to perform without any hindrances. This mode is particularly designed for sports vehicles as it does not hinder gas flow and enhances the car’s performance.
Engine’s Original Sound
The straight pipe lets the true sound of the engine come out. Normally, there are mufflers, catalytic converters, resonators, and other similar components present to reduce the sound of the engine. However, straight pipe exhaust allows the raw and pure sound of the engine to come out.
Less Weight
When a vehicle’s weight is reduced, it becomes faster and more efficient. Mufflers and catalytic converters weigh a lot, and if you love racing, you surely would want to have a lighter vehicle. A straight pipe exhaust weighs much less than the original exhaust.
Aesthetic Appeal
Straight pipes also give an aesthetic look to your vehicle and make it stand out. To make the vehicle look more appealing, you can apply a chrome finish to the exhaust tip. To give additional colors to the tip, various types of welding methods are used. You can even go for a twin-pipe setup for even better aesthetics.
Remarkable Fuel efficiency
Without mufflers and a catalytic converter, the engine creates low back pressure, leading to better combustion. This also means lower fuel consumption.
Straight-pipe exhaust systems also have their own cons, including:
Rampant Emissions
It’s true that straight pipes make a remarkable sound, but they are not great for the environment. In the late 20th century, catalytic converters came into the market to control the harmful gas emissions from cars into the environment. Removing catalytic converters can be really bad for the environment.
Expensive
Installing straight pipes can be expensive. New pipes are not cheap, and finding them at a good price is not easy, so most car enthusiasts go for custom-built exhaust pipes. Also, after installing a straight pipe exhaust system, you have to tune your car according to certain standards to get the most out of it.
It Might Not be Legal
Modifying a vehicle to a straight-pipe exhaust system and removing mufflers and catalytic converters is not legal in many states in the US. However, it varies from state to state. Therefore, before installing an exhaust pipe in your exhaust, you should go through your state’s rules.
Effects Resale Value
Customizing your vehicle can also make it harder to sell it at a high price in the future. An average buyer might not find pipe exhaust to be as valuable as you do. So, you might be forced to spend extra money on reinstalling a standard exhaust system or accept a low price when selling your vehicle.
The total cost of pipe exhausts depends on various factors, including the model of the vehicle, the materials used, and the length of the exhaust. Overall, you might have to pay around $200 to $1000 with a labor cost of about $100 to $600.
Keep in mind that depending upon the customization and the mechanic, the cost can go much higher. Generally, it is preferable to get quotes before choosing a professional.
Subscribe to SAT Japan to get all the latest car news, tips, and tricks for a smooth ride.